Are you a Gimp User? Despite of being a free software the facilities that Gimp provides is just fabulous. Do you want to know about how to curve text in Gimp? Today, I am going to discuss about this hot topic. From this text you will be able to know how to curve text in Gimp. So, this is going to be an exciting article for all Gimp users. Why we are making delay then? let’s get started immediately.
I am going to teach you with 7 easy steps. Are you looking for best photo editor in USA we are able to bulk photo editing services in USA, try our works.
Step #01: Taking the Background
First of all, you have to pick the background where you want to place the text. I am going to use white background

If you want to curve text on a picture then you have to choose open and the choose your preferred picture.
Step #02: Creating Path
Actually, we are going to curve text using path.

After this make a curve like this.
Video Tutorial Here
Our Popular Image Editing Services
CLIPPING PATH SERVICE
BACKGROUND REMOVE SERVICE
PHOTOSHOP MASKING SERVICE
PHOTO RETOUCHING SERVICE
NATURAL SHADOW SERVICE
PHOTO RESTORATION SERVICE
COLOR CORRECTION SERVICE
NECK JOINT SERVICE
VECTOR CONVERSION SERVICE
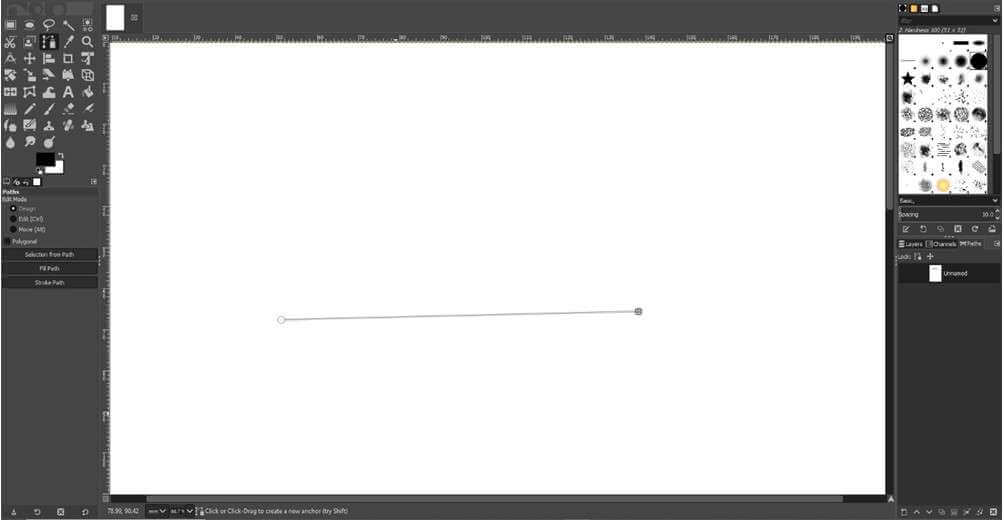
Then press one the middle of the path line and make it curve like this.

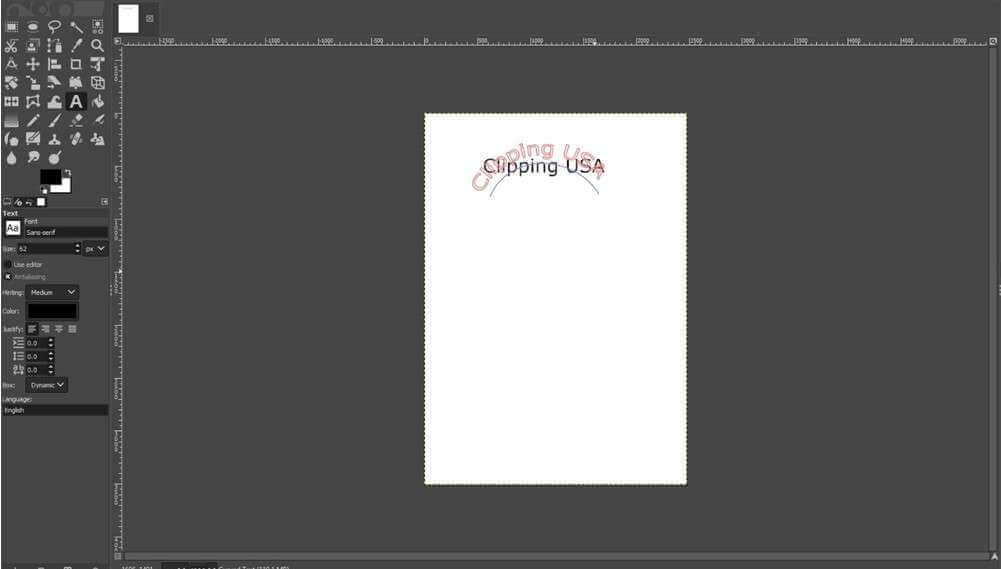
Step #03: Add text
In this step, you have to add text in the picture.Click on this icon to add text.

After this a dialogue box will appear and then write your text that you want to curve in Gimp.

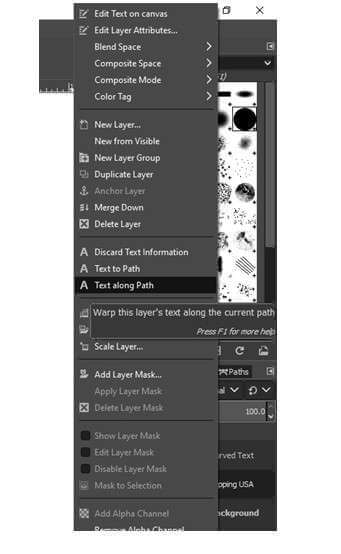
Step #04:Create a New Layer
At this stage, you have to create new layer in the picture to place the curve text there. To create a new layer, you have to go to this option

In this newly created layer, we are going to place the curve text in gimp. After picking the layer click right mouse on the layer and hit on this option.
Another Tutorial Here:
After this, the text will convert as path.
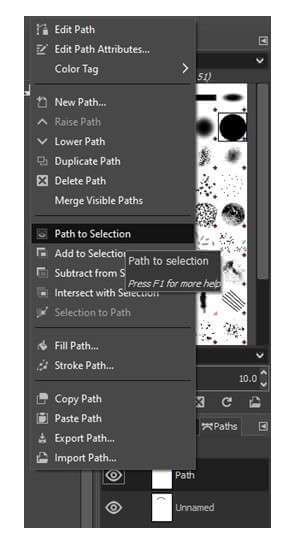
Step #05: Path Selection
To select the path, you have to go to the path section by clicking on the path icon beside the layer option.

After this, press here
Step #06: Color the text
At this point, you have to color the text. To do so pick this option.

After this you have to press on the text to add color.
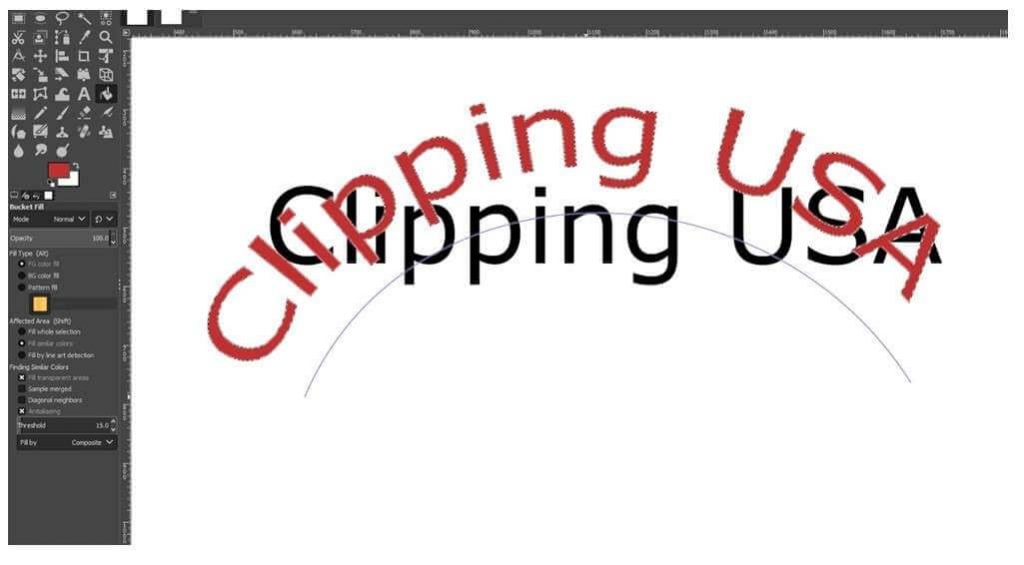
Look, the text has become curve.
Resources: https://www.techwalla.com/articles/how-to-curve-text-in-gimp
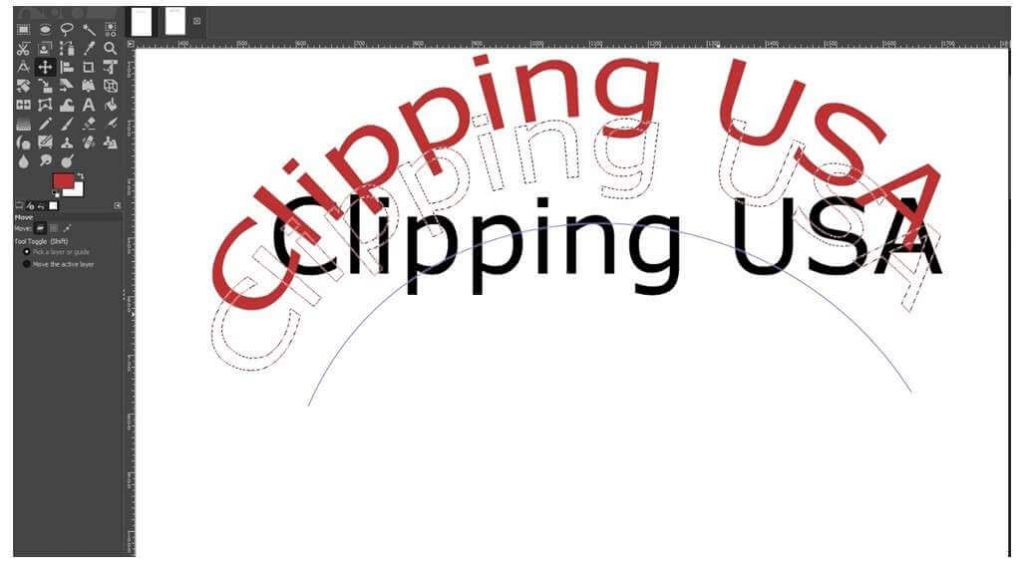
If you want to add multiple text you have to move the path by press and holding the mouse.Then move the text along path and make them separated like this.
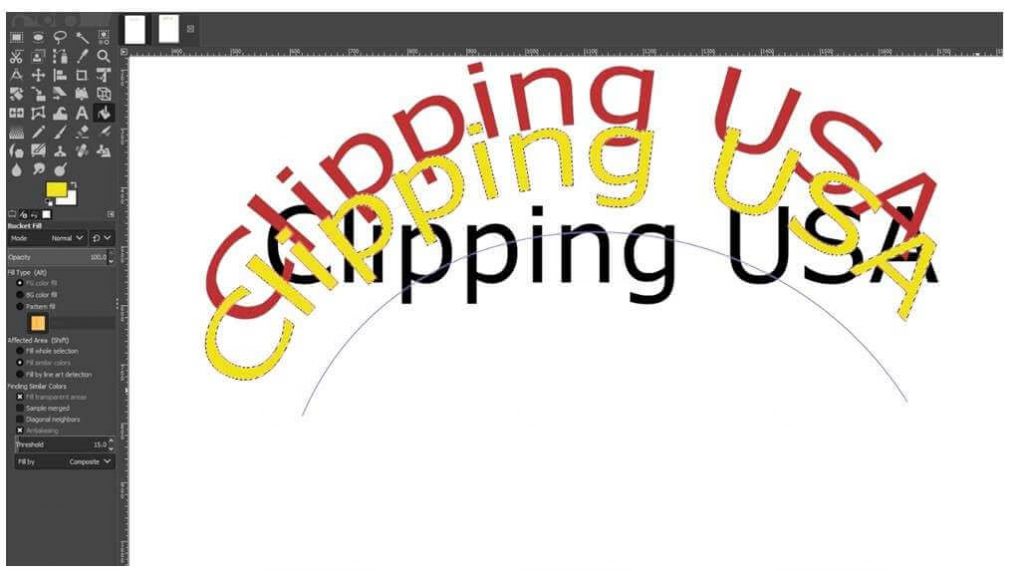
Later on,create a new layer in the previous process.Pick the color filler option once again and set your preferred color.
Final Step #07: Disable the layer.
In this step, disable the layer that you don’t want to keep.
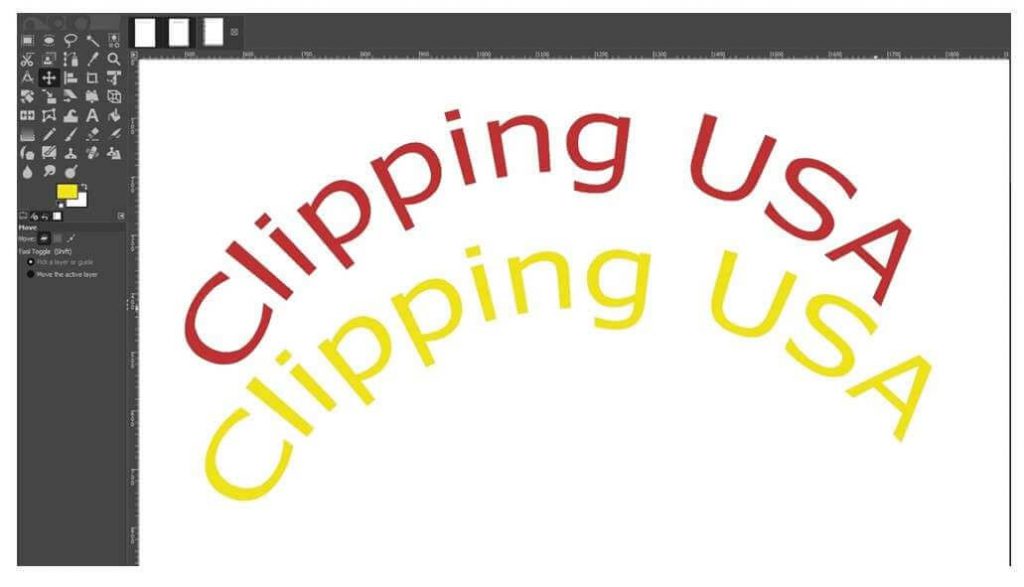
So, that’s the process.
For this tutorial I have used Gimp 2.10.10. If you want to curve text in Gimp 2.10.8 the process is similar. For Gimp 2.0 the process is a bit different but the basic is same.
Hope it will be useful for you. Stay tuned with us to get more awesome photo editing tutorial and photography tips.
Similar content : “How To Select Multiple Layers In GIMP”
#gimpcurvetext#curvetextingimp#curvedtextingimp#curvetextgimp#Howtocurvetextingimphttps://t.co/vxrq4nHKbX
— Ethan Tyler (@EthanTylerPro) December 27, 2019

P.O BOX; 10623
SILVER SPRING, MD. 20914
UNITED STATES.
info@clippingusa.com
+1 240 918 9262, +1 (301) 310 6411
HOUSE # 06, ROAD # 02,
SECTOR # 11, UTTARA, DHAKA-1230,
BANGLADESH.
info@clippingusa.com
+1 240 918 9262, +1 (301) 310 6411
12601 SUMMERWOOD DR,
SILVER SPRING, MD, 20904
UNITED STATES.
info@clippingusa.com
+1 240 918 9262, +1 (301) 310 6411