
For product display Shadow creating services are very popular nowadays. A key reason is maximum number merchandiser unattractive when they are in their raw and original view. Shadow services can help you to give those products an appealing look. It can attract viewers in effective way. Do you also want to get more customers by using that method? Then this article is going to be very helpful for you. So let’s continue.
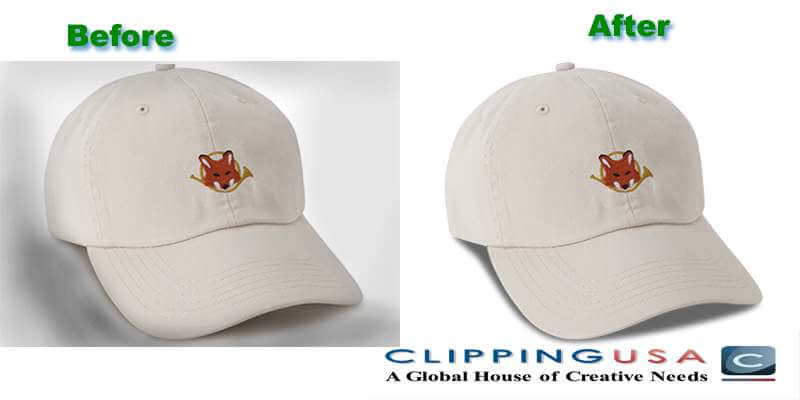
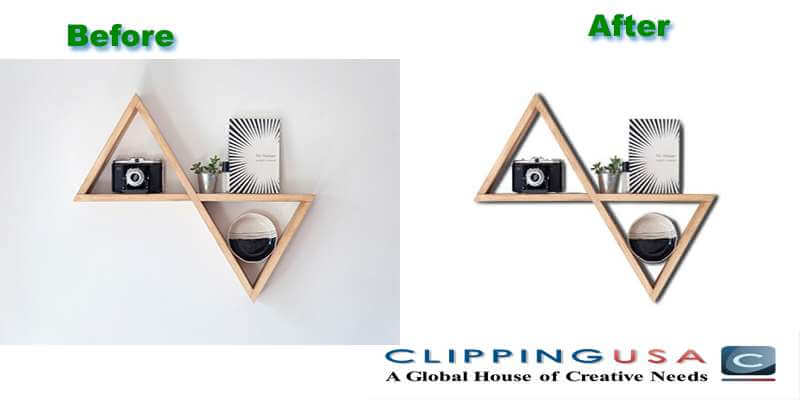
You can improve your product photo quality by adding shadow. That’s why creating of shadow for product display is very effective. Normally three types of shadow service are applied for Product Photography. These are Reflection Shadow Service, Natural Shadow Service and drop shadow service. Drop shadow also can be called as original shadow. These types of shadow mainly apply for Clothing Item such as Shirt, t-shirt, pant etc., Product Item such as book, table, clothes, pen, mobile, jewelries etc. Apart from these items, shadow technique also applicable for Modeling, different types of inside and outside photos.
You need to apply various types of image editing process along with Shadow creation such as Remove background. Otherwise, only shadow creation will not be sufficient enough. In fact, you need to apply several techniques like clean noises, color correction, retouching, masking etc. Then onecan afford get the best result.
Normally, some products look dull in their original look. For giving a smart and appealing outlook shadow is created manually by using various photos editing software. This process is called Shadow creation. As we mention there are mainly three form of shadow use for e-commerce business. Let me know you specifically about these.
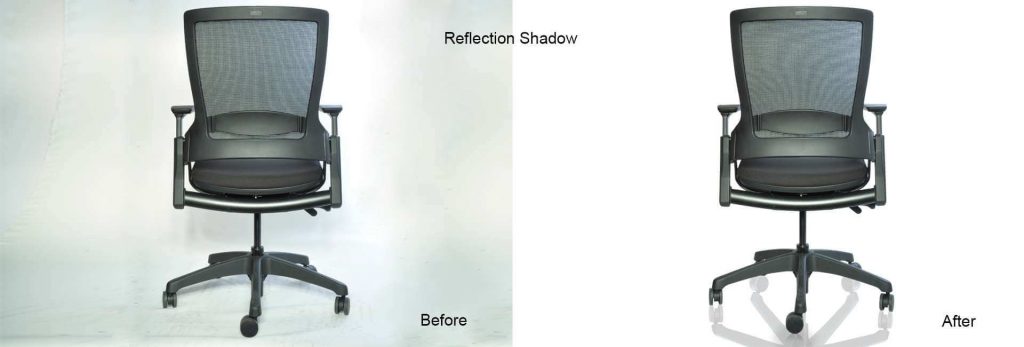
Reflection shadows area system of graphics design that makes a target over the remaining part of the photo by placing a straight shade beneath the object. It is used for adding a shadow affect into a photo. Reflection shadow creating services can create amazing pictures. Images are able to underline your emotion, customize the impressions and also could be applied in different ways. It also can be used with text along with makes visible images of specific object. These Shadows adds an extra dimension in a picture.
In this method, the original rear gets removed. In place of this, the object put it above a natural background. In later, dark shadows are being formed there. It seems to be a natural shadow. When the topic is about natural look, background surface that doesn’t reflect much can be a cause of boring. But natural shadow service is able to give your pictures a solid overview.
It is one kind of visual effect. It looks like the darkness of a target. In graphics design, it seems like a darkness of the target that gives an accurate impression of a target and the destination beneath it rose above. These complexions of darkness are mainly used for shoes, bag, jeweler; soft drinks these types of accessories. It’s also named as original shadow service.
Why one should use shadow service?
Shadow service is using vastly in photo editing service. Today you will know some key point about why you should use shadow service. Let’s find out.
Who should use shadow service?
Shadow service is using vastly in photo editing service. Today you will know some key point about why you should use shadow service. Let’s find out.
That’s a very good question. That question can float in your mind. I am giving you specific answer. Mainly shadow service is for:
Create a shadow in Photoshop
Basically, there are two types of shadows. One is called cast and another one named form. Are you thinking what cast shadow actually is and what is form shadow? A darkness that appears on the floor is called cast shadows. Another type of shadow is that arrive in the object.
These two types are considered by the indication, space and wellsprings of number available. Form shadows can be used in your object for giving clues as how an objective cast shadow will be produced. But you need to know about how shadow work before you start creating shadow in Photoshop. Normally, when cast darkness get more space from the targeted object it becomes more blur.
In this part, you are going to know about how to create a shadow in Photoshop. Let’s start
1ststep: Separate your background from object
At first open your picture that you need to customize. Then open your layers plate by choosing Windows followed by layers. Then you have to cut out the object and position it in a new tier. For indicating that the hinterland has been vanished you have to give your layer a new name to avoid confusion with other tier. Then mark the eye form to create the background optical. Now it will be able to see your object against a clear background.
2ndstep: Create a new hinterland beneath your separated object
In this stage, choose your hidden hinterland layer. Then go to Layer option followed by New Layer. You can also use shortcut from your keyboard type SHIFT+CTRL+N. For the Mac users press COMMAND instead of CTRL. It will form as new background. Then go to Edit and choose Fill for filling the layer. You can choose a manual color whenever you selects hading from drop down menu.
3rd step: Choose your cast shadow color
Now you need to choose your cast dark shadow color. You need to choose color considering the shading of your main target. Search a form shadow at a distance of your target then conduct eyedropper tool to choose that shadow. Now your chosen shading will be appeared as front color. You can bring back adjustment box by double clicking on the brand new hinterland. Now adjust your expected color. You need to make it a little darker and decrease its saturation.
4th step: To create a drop shadow
Select your separated object. Then nominate the drop shadow by clicking fx button. Now you need to replace shadow color with your forefront color. When you feel satisfaction including your drop shadow setting, click ok. I want to make a point that, the opacity, space and size are not so important right now.
5th step: Create a layer
In the fifth step, you need to go to layer then layer style followed by Create layer to isolate your drop shadow out of original layer. This gives you the option of modifying the shadow independent of the object. When warning box appeared just confirm ok.
6th Step: wrench the drop shadow
Select the recently made drop shadow layer from the layers choice. After this go to Distort from the Edit option for pulling below your drop shadow. In this case artistic knowledge comes very crucial. You need to catch the right pathof cast shadows considering where the forms of darkness are on your substance. You also need to consider about the erasing dots of your photos. It will be needed to indicate in which distance you should wrench the shadow. If you feel importance you can select specific portions of the shadow to provide the darkness added to entire portions of the target that are touching the floor.You need to set the blending mode of the shadow layer to normal. Then fill it to 100%.
Now it’s time to modify shadows. You can conduct there ct angular marquee tool. Then you need to go to distort again from the edit. When you are happy with your customization, apply all the entire transformation. If there are any edges, fix those edges with eraser or paintbrush. Then multiply your drop shadow. Then lessen the fill to 75%.
7th Step: Creatinga Channel
If you have followed previous steps properly, your shadows should look realistic. But job is not done yet. Creating an alpha layer can give you the access to do adjustment shadows that you need to make blurry. Go to windows followed by Chanel for creating an alpha channel. Now select the new channel. Default name of this channel will Alpha 1. You can keep it unchanged as default.
8th step: Creating a gradient
In this stage, from the Options palette at the highest point of your browser ensure the slope is set to dark to-white, and the inclination type is straight.
When your angle’s settings are right, set your cursor at the uttermost purpose of your shadow (or past) and draw the slope toward the piece of the shadow that is nearest to the article. The determination will be unmistakable as a red inclination overlaying your picture.
9th Step: Blur Selection
After creating gradient in your alpha channel, you will see a red slope on the above of your picture. For making it not distracting you can flip the eye symbol beside alpha 1.Now you need to click on the top channel from your Chanel Plate for selecting your color channel and make it unmark your alpha channel. Now assure that drop shadow layer is still selected.
Then use the lens blur option for controlling over blurriness. Uncheck the box that is next to preview. Assure that you have kept the focal distance at zero. Then check the box next to invert. Then enhance the number of radios. Then leave all other values at their default and click on ok.
10th Step: Create a layer mask
In this step, go to load selection. Then followed by the drop down option choose Alpha 1. You need to make assure that the radio button that is next to New Selection is checked. Now, approximately the darkest areas of the grade will appear. Press SHIFT + CTRL+ I to select contrary. Then you required to click on layer mask option from the beneath. A shadow will bloom to “fade” as it reaches into the space after the mask is being applied. You can also inspect that layer mask’s thumbnail is like the thumbnail that is alongside alpha 1.
11th step: Clean Up Shadows
This is the final step. Just make sure that the entire portion is blooming on the perfect position of your targeted object. Then you need to remove the shadow that isn’t belonging to your target.

That was the instructional exercise for making a shadow in Photoshop. You can sum up darkness to your article by applying these steps. I hope it will be helpful for you. If you want to protect your time you can take our shadow creation service. You can also get other photo editing service from ClippingUSA.

P.O BOX; 10623
SILVER SPRING, MD. 20914
UNITED STATES.
info@clippingusa.com
+1 240 918 9262, +1 (301) 310 6411
HOUSE # 06, ROAD # 02,
SECTOR # 11, UTTARA, DHAKA-1230,
BANGLADESH.
info@clippingusa.com
+1 240 918 9262, +1 (301) 310 6411
12601 SUMMERWOOD DR,
SILVER SPRING, MD, 20904
UNITED STATES.
info@clippingusa.com
+1 240 918 9262, +1 (301) 310 6411